|
PPGpS
|
User manual
|
Requirements
Quick start
Instruments
Altimeter
Waypoints
Fuel
Wind
Tracks
SOS
Offline map generator
Live tracking
Settings
Flynet2 and Flight Bandit
Requirements
- PPGpS uses your
smartphone's GPS. Make sure you have enabled the GPS in your
smartphone settings.
- Google
Map requires an internet connection.
- The live tracking
feature requires an internet connection.
- Sending SMS requires
GSM connectivity.
- FlyNet2 and Flight Bandit devices
require a Bluetooth connection.
Back to top
Quick start
Before takeoff :
PPGpS is preconfigured
in order to be used out of the box. The first GPS fix may take several seconds.
As soon as your GPS
receives a fix :
- Instruments are updated.
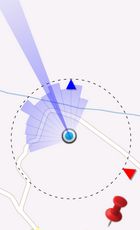
- Your location is
displayed at the center of the scrolling map and is represented by :
Takeoff :
Takeoff is
automatically detected.
Takeoff location is recorded and displayed on screen with the following
icon :
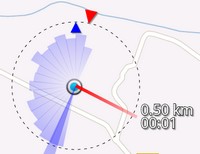
During the flight :
During the flight, data
is updated in real-time :
- The long blue beam
represents the Actual
Bearing... that is where you are actually going.
- Short
blue beams represent Average
Speeds by azimuth . As soon as you have flown a few
seconds heading in a new direction, a blue beam is
drawn in that direction. The longer the beam, the
faster the average speed is in that direction.
- Red triangle shows Wind direction.
- Blue triangle
shows the actual orientation of your smartphone on the map. It may be
slighltly different from the Actual Bearing in case of lateral wind.
All the instruments are described in
the
next chapter.
When the takeoff
location is no longer on the map, a red line
shows
:
- Heading to
the takeoff location.
- Estimated
time to return home.
Landing :
After landing (which is auto detected), the flight is recorded
in a Google Earth compatilble KML
file. The
list of all recorded flights is available with the Tracks menu.
Back to top
Instruments
Instruments units of
measure should be set in the
Settings / Unit of measure menu.
-
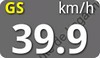
GS (Ground Speed) : GPS given speed
3 modes are available :
- Instantaneous speed
- Maximum speed (^)
- Average speed (~)
Short click on the
instrument to switch to the next mode.
Long click on the instrument to reset the maximum G value to 1.
-
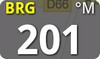
BRG (Bearing) : Bearing given by GPS
In degrees (0-360) relative to magnetic north.
-
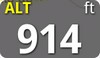
ALT (Altitude)
: Altitude
given by GPS
GPS altitude is based
on the WGS84 system and may be inacurate.
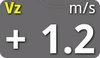
-
Vz (Vertical Speed) : Vertical speed
This instrument can use 3 different data providers:
- GPS
- Internal barometer
- FlyNet2
- Flight Bandit
- G : Acceleration
given in g
2 modes are available :
- instantaneous number of G
- maximum number of G (^)
Click on the instrument
to switch to the next mode.
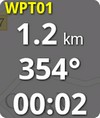
As soon as a waypoint
is selected, the following information is displayed:
Click on the instrument to select a waypoint among the list of all
waypoints.
See
Waypoint management
chapter for more information.
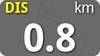
Traveled Distance since
last takeoff. This information will be recorded in the KML
track file.
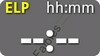
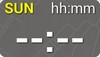
2 modes are available :
- elapsed time
- sunset time
Click on the instrument
to switch to the next mode.
Elapsed time since last
takeoff. This information will be recorded in the KML
track file.
Computed sunset time, based on your current location and date. It is available afer you have been located.
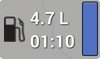
Remaining fuel quantity
and estimated remaining flight time are displayed in the gauge. Click
on the instrument to input the actual quantity in the tank before
takeoff.
Fuel consumption parameters are available in the menu
Settings / PPG preferences.
Consumption setting is fully described in the
Fuel
chapter.
Back to top
Altimeter
setting
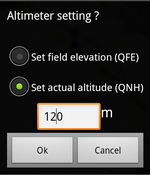
At any time you can set
an altimeter offset.
- Press on the ALT
instrument during a couple of seconds to display the
altimeter settings form.
- Choose QFE to set
the altimeter to zero. In this case, the altimeter will display the
elevation on top of the field.
- Or, choose QNH and
enter manually the actual altitude. In this case the altimeter will
display the actual altitude.
Back to top
Waypoints
Add a waypoint on the map
- Use the menu Waypoints
/ Add on map.
- A message "Tap
on screen to create the waypoint" is displayed.
- Slide the map to where you want to add a waypoint.
- Tap once quickly on the map to create the
waypoint.
- An icon is drawn on the map to represent the waypoint.
- The message "Waypoint
successfully added" is displayed with its coordinates.
The new waypoint is not
automatically selected. Click on the WPT instrument to display the
waypoint list.
Add a waypoint by its
coordinates
- Use menu Waypoints
/ Add coordinates.
- An input form is displayed.
- Enter the Latitude and Longitude (decimal format is
required).
- Click on Add.
- The message "Waypoint
successfully added" is displayed with its coordinates.
The new waypoint is not
automatically selected. Click on the WPT instrument to display the
waypoint list.
Import waypoints from a file
Waypoint preparation
can be done from Google Earth on your desktop computer, before the
flight. Numerous web sites explain how to proceed.
Once the KML file with your waypoints has been prepared, copy
it on the PPGpS folder of your smartphone.
- Use menu Waypoints
/ Import from file.
- The KML file list is displayed.
- Click on the file to be imported.
- The message "Waypoints
successfully imported" is displayed.
Waypoints are drawn on
the map and you may select one of them from the waypoint list which is
available while clicking on the WPT instrument.
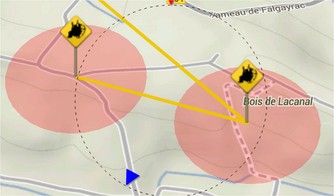
Route
The route is made up of
all waypoints. It is drawn by a
yellow line.
A red circle is
drawn around the waypoints to show up the 250 meters detection zone.
A green circleis
drawn around the active waypoint. Entering into the proximity zone will
trigger the automatic selection of the next waypoint (if available).
Waypoint list
A click on the WPT
instruments reveals the waypoint list.
Waypoints may be automatically restored when the application
starts.
Waypoints may be automatically saved when the application
stops.
This behaviour is configurable in the Settings / Waypoints parameters
menu.
Press on a waypoint for
a couple of seconds to display the
waypoint menu.
Rename a waypoint
- Select any waypoint in the waypoint list.
- Long press on the item to display the context menu.
- Select Rename.
- Type in the new waypoint's name and validate.
Delete a waypoint
- Select any waypoint in the waypoint list.
- Long press on the item to display the context menu.
- Select Delete.
Back to top
Fuel
Fuel consumption is
estimated according to several parameters that you should set up in
the Settings / PPG settings menu.
Default actual quantity
in the tank
Input the default fuel
quantity that you want the application to set up everytime the
application is started.
You can adjust this quantity before taking off by clicking on the fuel
gauge instrument at any time.
Consumption per hour
Input the average
consumption of your motor. Consumption computation will be done
according to this parameter.
Low fuel threshold
Set the minimum fuel
quantity before warning. Once the threshold is reached, the gauge
instrument will turn to red to warn you..
Back to top
Wind
During the
flight, ground speed samples are recorded. Average speeds per
sectors are computed and the wind direction is estimated.
Wind direction is represented by a red arrow.
The Wind reset
menu allows you to clear all average speeds in order to restart speeds
sampling and wind direction estimation. Use this function
when your cruise altitude has changed, or when you want to estimate
wind direction locally before landing.
Tips to get a good wind estimation after Wind reset :
- fly a flat 8 in the air,
- keep constant altitude,
- don't turn too tight in order to give time to the
application for gathering speed samples at every bearing.
Back to top
Tracks
After landing, your
flight will have been recorded in a file. KML, GPX and IGC format are
currently available.
Files are stored in the /PPGpS
folder of the smartphone internal SD Card. These files may be
copied on your computer via USB connection.
The Tracks menu
gives you the list of all the recorded log files.
Long press on a file name to display the context menu.
Send / Share
Select Send or Share to export your file (E-mail, Bluetooth, Google +, ..).
You will then be able to share your flights with your friends and
familly with Google Earth or any other IGC/KML compatible software.
Details
Shows your track on a map.
Replay
Simulate the recorded flight.
Delete
Delete the log file. Be
carefull, the file cannot be restored.
Back to top
Offline map generator
If you wish to use
PPGpS in flight without any internet connection, you will have to prepare your maps before flying.
Click on the Maps menu to display you offline maps. Press on + the menu bar to start the built-in offline map generator.
Input the name of the offline map you want to create.
Select the zoom levels you need but keep in mind that big maps with a lot of zoom levels may take a
very long time to be downloaded and will generate a huge zip file.
Select the map provider you want to download from and click on
the map to set the upper left and bottom right corners of the zone you
want to download.
Start to download and be patient. In case a connection error occurs, relauch the download. Tiles are kept in a cache.
A zip file containing all the tiles will be generated in the maps folder.
You will not need to select a particular map file in your list because
PPGpS will explore all the files to find the relevant pictures
according to your location.
Back to top
SOS
The SOS feature enables
you to send quickly send an
SMS.
The content text may be typed in advance from the Settings / Flight settings / SOS default message
menu. So, you will not need to input it from the field where you've
just made your emergency landing.
To this default text will be automatically added :
- actual postion : Latitude / Longitude
- a Google maps link to help your friend to rescue
you
You just need to select
phone numbers from your contact list and wait to be rescued.
This feature is only
available if your actual location was acquired by the GPS.
Back to top
Live Tracking
The Settings / Flight settings / Live tracking menu
allows you to activate the live tracking feature.
During the flight, your actual location will be sent to the PPGpS web
server.
Your familly and friends will be able to locate you on the map
on www.ppgps.info
This feature requires an internet connection.
The update frequency may be adjusted in the Settings / Flight settings /
Tracking update frequency menu.
Back to top
Settings
The Settings menu gives
you the possibility to set the parameters of the software according to
your needs. Several categories of parameters are available.
Each parameter is briefly described with a small text under
the menu itself.
- Instruments settings
- Map settings
- Flight settings
- PPG settings
- Units of measure
- Waypoint settings
- System settings
Back to top
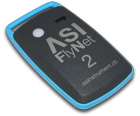
Flynet2 and Flight Bandit
PPGpS is compatible
with ASI FlyNet2 and Flight Bandit variometer.
Prerequisites
Bluetooth is enabled on your smartphone and Flynet2
module is already paired.
PPGpS configuration steps
- Use menu Settings
/
System settings / Bluetooth variometer settings.
- Select the bluetooth device.
- Use menu Settings
/ Instrument settings / Variometer data.
- Select FlyNet2 or Flight Bandit data
provider.
Connection
before flying
Connection shortcut:
- Press on the variometer instrument during a
couple of seconds (Vz).
Other way via menu:
- Use menu FlyNet2 or Flight Bandit.
- Select Connect.
In case these
menus are not enabled, please check that you have performed the
configuration steps, as described above.
Back to top